DIY Non-Toxic & Natural French Manicure Without Polish
This post may contain affiliate links, which means I may earn a small commission if you make a purchase through these links — at no extra cost to you. Thank you for supporting the content I create here on the blog! You can read my full Disclosure Policy for more details.
In this article
There’s something about a French tip manicure that never goes out of style. It’s effortlessly elegant, subtly polished, and always très chic. But what if we could take that classic French beauty and infuse it with something even more timeless—nature?
This isn’t your average French tip tutorial. We’re trading synthetic polishes and chemical-laced removers for botanical pigments, mineral-rich clays, and a touch of French slow living. Think of it as a soft, minimalist homage to Parisian grace—with a nourishing, holistic twist.
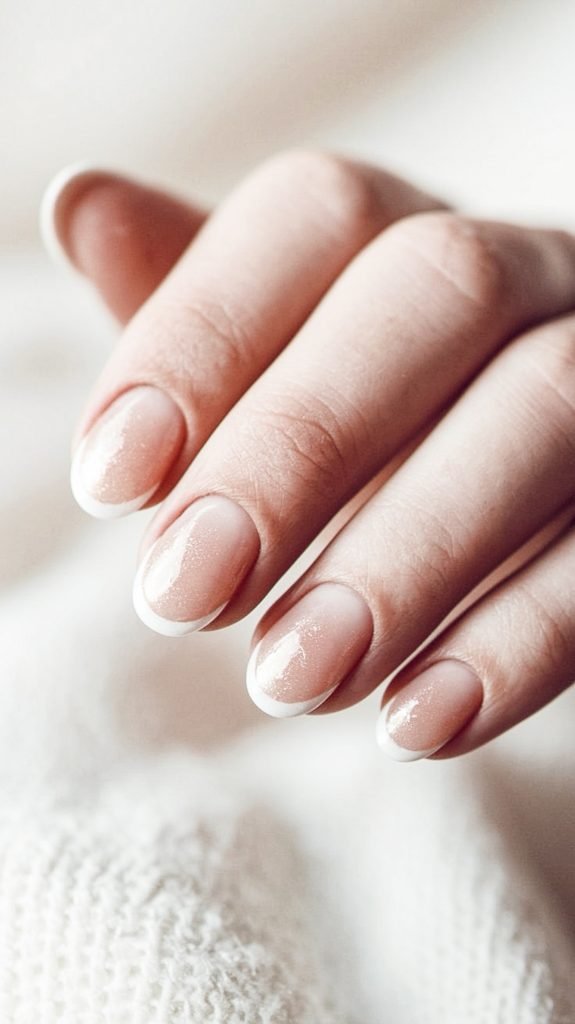
In this guide, you’ll learn how to create a DIY non-toxic and natural French manicure without polish, using plant-based ingredients for soft, healthy, radiant nails.
What Makes It French?
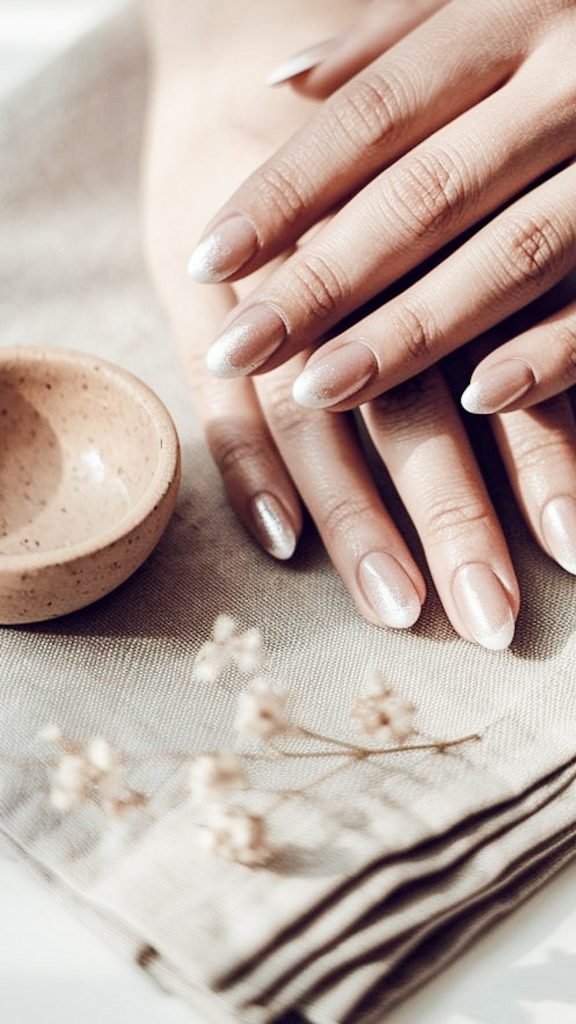
The real French tip (called la French manucure in France) isn’t always about those stark white tips and plastic-looking overlays. In France, it’s all about subtlety, breathability, and embracing the natural shape of your nail.
French women prefer:
- Soft pinks over bright polish
- Sheer, clean bases instead of heavy coats
- Understated beauty over bold trends
- Beauty routines that nourish instead of conceal
This DIY version captures that same spirit—simple, natural, and absolutely enchanting.
DIY White Tips vs. the Classic White Pencil
Raise your hand if you’ve ever used a white manicure pencil to brighten your nail tips from underneath! it’s been a minimalist beauty staple for decades. It’s quick, easy, and creates that crisp French tip illusion without polish.
But how does it compare to the DIY white tip methods?
| Feature | DIY White Tip Options | Traditional White Pencil |
|---|---|---|
| Where it’s applied | On top of the tip or underneath | Under the free edge |
| Look & finish | Matte, soft-focus, or pearlescent | Clean, crisp, chalky |
| Wear time | 1–3 days (fades naturally) | 1–2 days (washes off easily) |
| Ingredients | Plant-based, mineral-rich, nourishing | Chalk or wax-based, not nourishing |
| Texture | Customizable: creamy, powdery, or luminous | Dry, firm tip |
| Reapplication | Easy, part of the ritual | Quick but requires frequent touch-up |
| Effect on nail health | Supports nail strength & hydration | Neutral—doesn’t harm or heal |
| Aligned with slow beauty? | 100% | Minimal |
Why This Method Is So Good (Even If It Takes a Little More Time)
Yes—this approach takes longer than swiping on polish. It fades more softly. It asks you to show up every couple of days.
And honestly? That’s kind of the point.
1. It Turns Nail Care Into Me-Time
Instead of squeezing in a mani between emails, this method invites you to slow down. Each step is intentional. Calming. Grounding. It’s a reminder that beauty doesn’t have to be rushed.
2. It Fades Gracefully (No Chips Here)
No flakes. No awkward halfway moments. These natural layers soften and fade like blush on skin—never harsh, never messy.
3. You’re Caring for Your Nails, Not Covering Them
Every refresh hydrates cuticles, strengthens nails, and supports healthy growth. Think hibiscus for keratin support, clays for minerals, and oils that actually soak in.
4. It Creates a Rhythm
A little touch-up every few days becomes a check-in with yourself. Ten quiet minutes. A cup of tea. A deep breath. Suddenly your nail routine feels… meaningful.
5. It’s Real Beauty
Nothing artificial. Nothing hidden. Just your natural nails—softly enhanced, not masked. Honest, intentional beauty at its best.
Natural White French Tip Options
1. White Clay Paste (For Top-of-Nail Tips)
A soft, matte white tip that mimics traditional French polish—without blocking nail health.
Benefits of Ingredients:
- White Kaolin Clay: Mineral-rich, gentle, and naturally cleansing; gives a soft white hue without being abrasive
- Rosewater: Hydrates and tones the nail, helps the clay glide on smoothly
Ingredients:
- ½ tsp white kaolin clay
- 1–2 drops rosewater
Instructions:
- In a small bowl, mix the clay with rosewater until a smooth paste forms.
- Apply to the tips of clean, dry nails using a fine brush or cotton swab.
- Let dry 5–7 minutes.
- For a more polished look, buff lightly with a soft cloth once dry.
- Seal with a drop of almond or jojoba oil if desired.
How Long It Lasts:
- Lasts 1–2 days depending on hand washing and oil use
- Can be refreshed daily or layered for touch-ups
- Fades naturally with wear—no flaking
2. Arrowroot Paste (For Translucent White Tips)
A lighter, sheer version of the French tip that blends naturally into your nail.
Benefits of Ingredients:
- Arrowroot Powder: A soft, silky powder that offers gentle brightness and adhesion without harshness
- Aloe Vera Gel: Adds hydration and improves spreadability
- Jojoba Oil (optional): Mimics skin’s sebum, seals in moisture and gives a smoother finish
Ingredients:
- ½ tsp arrowroot powder
- 1 drop aloe vera gel
- Optional: 1 drop jojoba oil
Instructions:
- Stir arrowroot and aloe together until it forms a smooth cream.
- Add jojoba oil if you prefer a silkier, more blendable texture.
- Using a detail brush, apply to the nail tips following the natural curve.
- Let dry for 5 minutes.
- Buff or leave as-is for a barely-there look.
How Long It Lasts:
- 1–2 days
- Fades gently and can be reapplied easily
- Slightly more delicate than clay, but more subtle in appearance
3. Under-Nail Botanical Balm (White Manicure Pencil Substitute)
For a clean, bright tip from below—replacing the traditional white nail pencil.
Benefits of Ingredients:
- Arrowroot Powder & Kaolin Clay: Add gentle brightness and absorb moisture
- Shea Butter or Jojoba Oil: Deeply moisturizing, protects nail edge from cracking and peeling
- Lavender EO (optional): Calming and mildly antibacterial
Ingredients:
- 1 tsp arrowroot powder
- ½ tsp white kaolin clay
- 1 tsp shea butter or jojoba oil
- Optional: 1 drop lavender essential oil
Instructions:
- Gently warm the shea butter (if using) until soft but not melted.
- Stir in the powders until you get a thick, creamy balm.
- Use a cotton swab or fine brush to apply the balm just under the free edge of each nail.
- Buff off any excess from the skin or fingertip.
- Let it set for 5 minutes.
How Long It Lasts:
- 1–3 days (depending on handwashing and wear)
- Easily reapplied and deeply conditioning
- Works especially well if you wear your nails a little longer
Storage Tip:
- Store extra balm in a small glass jar or tin for up to 1 month
- Keep cool and dry—no refrigeration needed
4. Zinc & Mica Under-Nail Paint (Pearlescent Finish)
A luminous, light-reflecting brightener painted under the tips for a subtle shimmer.
Benefits of Ingredients:
- Non-Nano Zinc Oxide: Naturally brightens and reflects light, adds a pearlescent white glow
- Jojoba or Almond Oil: Deeply nourishing and keeps the formula breathable
- Mica Powder (optional): Adds a shimmering finish in a natural, mineral-safe way
Ingredients:
- ½ tsp non-nano zinc oxide
- 1–2 tsp jojoba or almond oil
- Optional: ⅛ tsp white or champagne mica powder
Instructions:
- Mix all ingredients into a smooth liquid paste.
- Use a precision brush to gently paint under the free edge of your nails.
- Let sit for a few minutes before touching anything (it doesn’t fully “dry” like polish but sets softly).
- Wipe excess gently from surrounding skin if needed.
How Long It Lasts:
- 1–2 days
- Can be buffed off or refreshed easily
- Leaves a subtle shimmer even after gentle wear
5. DIY Pearl Serum Topper (Shimmer Finish for Whole Nail)
A delicate alternative to top coat that adds a pearlescent glow while nourishing the nail.
Benefits of Ingredients:
- Mica Powder: Light-reflective and natural; adds radiance without blocking breathability
- Arrowroot Powder: Softens shine and balances shimmer
- Jojoba or Almond Oil: Nourishes nail beds and enhances sheen
- Vanilla or Rose EO (optional): For a light, luxurious scent and skin-loving benefits
Ingredients:
- ½ tsp white mica powder
- ½ tsp arrowroot powder
- 2 tsp jojoba or almond oil
- Optional: 1 drop vanilla or rose essential oil
Instructions:
- Stir all ingredients together until fully blended.
- Apply a small amount to each nail using your fingertip or a soft brush.
- Gently buff in circular motions to spread the shimmer and seal your nail.
- Let settle for 2–3 minutes, then admire the glow.
How Long It Lasts:
- 1–3 days depending on washing and oil contact
- Can be reapplied daily as part of your self-care ritual
A Step-by-Step Guide to the Non-Toxic French Manicure
Prep with a Lemon Soak & Buff (Optional But Recommended)
Your nails naturally accumulate buildup and light discoloration from herbal stains, tea, spices, oils, and daily wear. Over time, this can dull the natural white tip of the nail and make it harder for botanical pigments to absorb evenly.
A lemon soak helps to:
- Lift mild stains and surface residue
- Whiten and brighten the free edge of the nail
- Soften keratin layers so your stain and clay tip apply more evenly
- Create a fresh, clean canvas for your slow beauty ritual
The act of soaking your hands in warm water and lemon is also deeply grounding. The citrus aroma uplifts your mood while the warmth relaxes your nervous system.
Ingredients:
- Juice of ½ fresh lemon (organic preferred)
- 1 cup warm water (not hot—lukewarm is best to avoid dryness)
- A soft nail buffer, muslin cloth, or smooth washcloth
- A few drops of jojoba or sweet almond oil (for aftercare)
- Optional: add a pinch of dried rose petals, chamomile flowers, or a cucumber slice to your soak for a spa-like touch
Instructions:
- Set the mood. Light a candle or play soft music if you like. This is a moment just for you.
- Prepare the soak. In a small bowl, mix lemon juice and warm water.
- Soak your fingertips (not full hands) for 5–7 minutes.
- Pat your hands dry, then gently buff the tips of your nails using a soft cloth or nail buffer. Use light, circular motions—don’t file or scratch.
Why It Works:
- Lemon juice contains natural citric acid, which gently dissolves surface stains without stripping the nail.
- Vitamin C supports healthy nail growth and brightens the tips naturally.
- Buffing after soaking polishes away dullness and reveals a smooth, luminous edge.
- Plant-based oils hydrate and condition, helping your nails stay strong and flexible.
This ritual mimics the effect of a whitening pencil—but instead of coating your nails in chalk, you’re revealing your natural glow.
Step 1: Apply the Natural Pink Nail Stain (Base Color)
- Buff your nails gently to remove surface oils and create a smooth texture.
- Use a cotton pad with lemon juice or apple cider vinegar to lightly cleanse your nail beds.
- Apply your natural pink stain using a nail brush or cotton swab.
- Let sit for 10–15 minutes.
- Rinse with lukewarm water only (no soap), and gently buff for shine.
- Optional: Repeat for a deeper tint.
You’ll now have a soft, blush-toned nail base that’s breathable and naturally beautiful.
Step 2: Add the White Tips
Choose either a top-of-nail white paste (like clay or arrowroot) or a natural under-nail brightener (like zinc or balm). You can also layer both for that polished, dimensional French tip look.
Apply your chosen white tip using a fine brush or angled cotton swab.
- Let dry for 5–7 minutes.
- Buff lightly if desired for a faded, powdery finish.
- For under-nail paint: apply underneath the free edge, wipe excess, and let settle.
Step 3: Optional Pearl Topper for Glow
For a soft, candlelit shimmer:
- Apply a drop of the DIY Pearl Serum over each nail.
- Use your fingertip to buff it gently in circular motions.
- Admire the glow—natural, dewy, and barely-there beautiful.
Step 4: Seal with Nourishing Oil
Massage jojoba or almond oil into your nails and cuticles. This seals in moisture, adds a natural shine, and keeps everything soft and flexible.
Step 5: Ritual Finish (Optional but Lovely)
- Light a candle.
- Make rose or lavender tea.
- Sit quietly for 5 minutes and reflect—your beauty ritual is now complete.
FAQs About This DIY Non-Toxic & Natural French Manicure Without Polish
1. Will the natural white tip ingredients stain my nails over time?
Nope! Ingredients like white kaolin clay, arrowroot, and zinc oxide don’t stain the nail plate—they sit on top or beneath the nail, then gently fade or wash away with wear. These are mineral-based, breathable, and non-damaging.
2. Can I do this manicure on short nails?
Yes! In fact, this look is especially beautiful on natural, short-to-medium nails. French tips done with soft clays or under-nail whiteners enhance the natural shape without adding bulk or artificial length.
3. What if my nails are ridged or uneven—will this still work?
Absolutely. Buffing lightly before application helps smooth the nail surface, and natural pigments like hibiscus stain into the keratin, enhancing texture rather than emphasizing it. Plus, oils in the recipe deeply condition dry or brittle nails.
4. Can I use these ingredients if I have nail damage or peeling?
Yes—but go gently. These botanical and mineral-based blends are free from irritants and may actually help nourish weak nails. Still, if your nail beds are open, cracked, or severely damaged, give them time to heal or consult a natural health practitioner before applying anything.
5. How do I remove the stain if I want a clean slate?
There’s no need for acetone or polish remover! Just gently buff the surface of your nails with a soft cloth or nail buffer, soak your hands in warm water with lemon juice or apple cider vinegar, and apply a drop of jojoba oil afterward. The stain fades naturally, but this will help speed things along.
6. Can I mix the pink stain and white tip into one product or step?
They’re best applied in layers for contrast and clarity. But if you’re after a more blended or blurred look (like a soft ombré French tip), you can experiment by using a pinker version of the arrowroot or clay tip recipe, then feather it downward for a dreamy gradient.
7. Will this survive handwashing or doing dishes?
Because this method uses breathable, non-sealing ingredients, it may fade faster with frequent handwashing. We recommend applying a fresh layer every 2–3 days—or after dishwashing—to keep your nails looking soft and luminous. Applying almond or jojoba oil afterward helps maintain the look.
8. Can I apply this over a nail strengthener or base coat?
This method is meant to absorb into or sit gently on the nail itself, so applying it over a conventional base coat may block the stain. If you want extra protection, use a non-toxic, breathable base—or just buff and seal with oil after staining instead.
9. Is this safe for kids, teens, or during pregnancy?
Yes! Every ingredient used is gentle, non-toxic, and free from formaldehyde, toluene, phthalates, and synthetic fragrance. Just skip essential oils for kids or during pregnancy unless you’ve confirmed they’re safe.
10. Can I take this with me for travel or use it on-the-go?
Totally. You can pre-mix dry versions of the pink stain and white tip powder into small tins or jars, then activate with rosewater or oil while traveling. It’s TSA-friendly and completely plastic- and polish-free.

