
Rose-Water Nails: The Complete Guide to a Sheer Pink Manicure Without Gel
This post may contain affiliate links, which means I may earn a small commission if you make a purchase through these links — at no extra cost to you. Thank you for supporting the content I create here on the blog! You can read my full Disclosure Policy for more details.
Gel nails? Great in theory. Outstanding, even. Until you’re sitting in the harsh, unforgiving glow of your bathroom light at 1:00 AM, desperately trying to scrape three layers of cured polymer off your hands with a metal tool like a feral raccoon digging through a dumpster, leaving your actual nail beds looking like dried-up crepe paper.
We are officially done doing that to ourselves.
Enter: Rose-Water Nails.
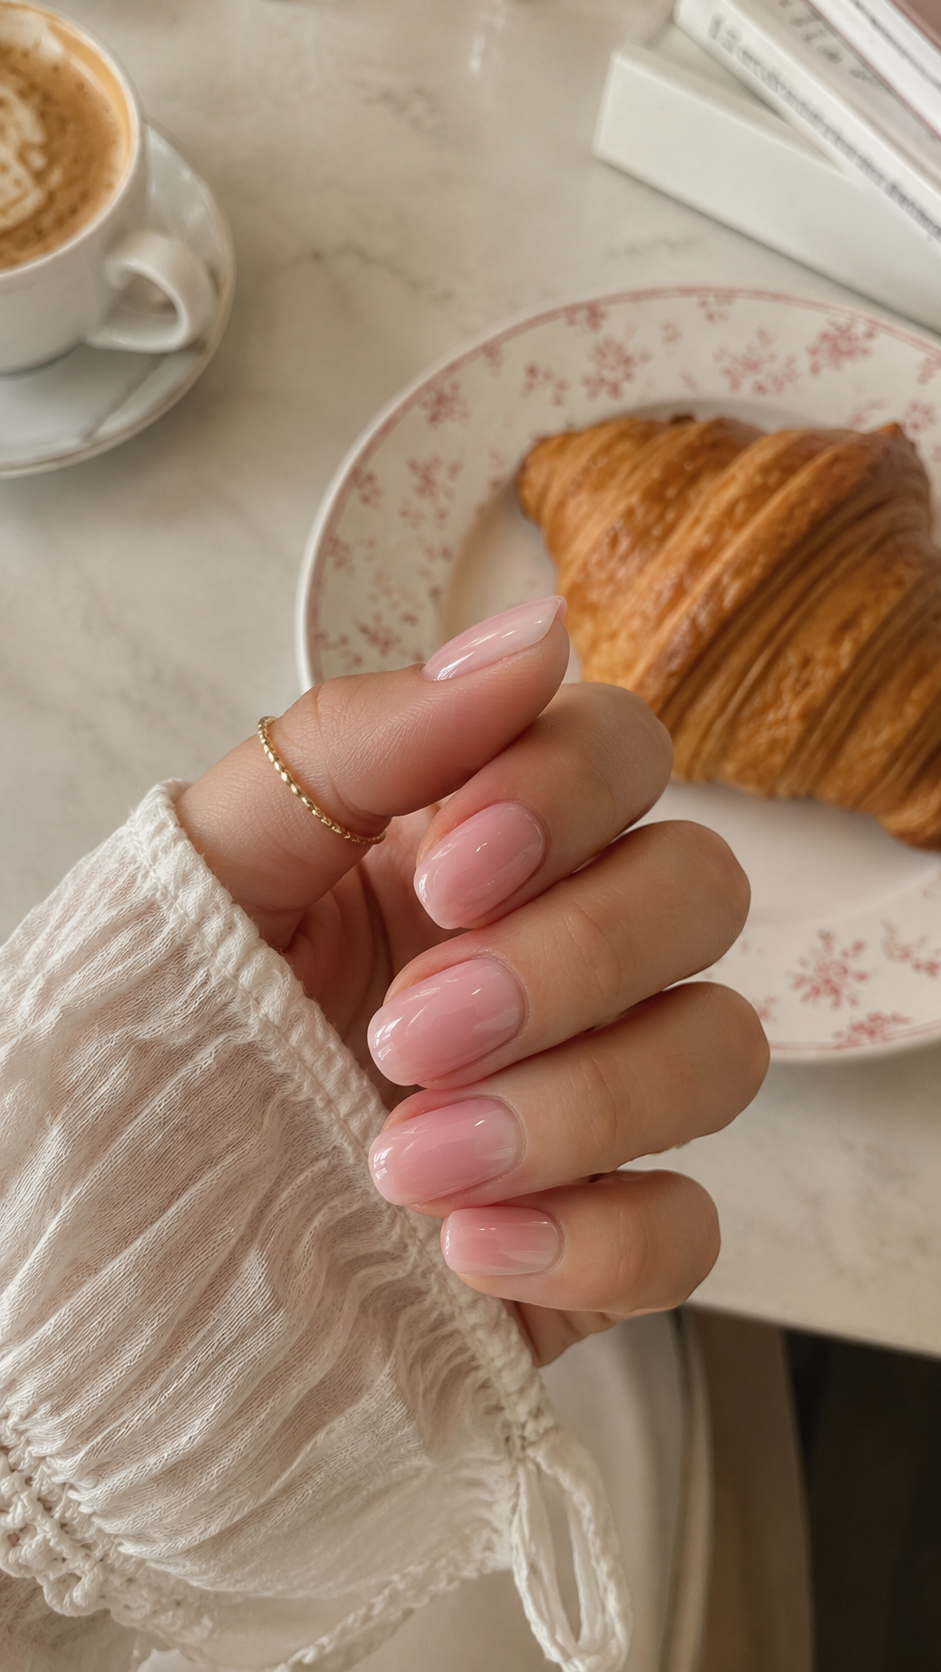
It isn’t gel. It isn’t a $90 salon treatment that swallows two hours of your precious Saturday while you make awkward small talk. It is that ultra-sheer, jelly-like, barely-there, “I drink three liters of lemon water a day, practice inner peace, and my life is totally under control even though I just forgot my own zip code” pink flush. It’s glowing, skin-softening, hyper-natural, and—best of all—you can pull off this no-gel sheer pink manicure at home without inhaling pure acetone fumes or baking your hands under a UV lamp like a hot pocket.
Grab a cold beverage. Put your hair in a claw-clip that is hanging on by a single plastic tooth. Clear off a tiny corner of your desk. Here is the ultimate step-by-step guide to getting the rose-water nail trend using natural botanical care, low-toxicity prep, and zero artificial lights.
TL;DR: The “Rose-Water Nail” aesthetic is a natural, ridiculously low-maintenance manicure trend focused on hyper-hydrated cuticles, smooth natural nail beds, and a translucent, watery-pink flush. It relies on natural plant stains (like hibiscus tea or beet extracts), heavily diluted sheer non-gel polishes, or tone-correcting concealers, sealed with high-gloss natural oils or plumping topcoats rather than thick acrylics or cured gel.
What Is the Rose-Water Nail Trend?
Imagine dropping a single, crushed rose petal into a glass of warm mineral water. The water doesn’t turn opaque brick-red. It turns into a translucent, juicy, glass-like flush of soft pink. That is precisely what we are doing to the nail plate.
Unlike traditional opaque pink polishes (which can look flat, chalky, or like white-out mixed with food coloring) or thick gel builder manicures (which create a raised plastic shield over your fingers), the rose-water look is completely sheer. It relies on lighting, deep hydration, and subtle tone correction to make your natural nails look healthier, brighter, and effortlessly rich.
Achieving this look relies on three core principles:
- Plate Health Over Heavy Coverage: Because your natural nail bed is 100% visible, the keratin plate itself needs to be smooth, bright, and deeply hydrated rather than buried under layers of plastic resin.
- Optical Tinting: Staining or sheer-tinting the nail naturally to neutralize yellow undertones and enhance the natural blush of the living tissue underneath.
- High-Gloss Liquid Finish: Letting micro-buffing, light-reflecting plant oils, or high-shine non-gel topcoats do the heavy lifting instead of synthetic gels that chip while you’re trying to open a can of seltzer.
Phase 1: The Tools (Throw Out the Sharp Objects)
Before we start splashing botanical tea everywhere, we need to inspect your tool kit. Half the reason our natural nails look damaged, jagged, or sad is that we treat them like industrial materials instead of delicate living tissue.
What to Throw Away (or Hide from Yourself):
- Metal Cuticle Nippers: Put them down! Stop cutting your cuticles! Cutting the eponychium (the living skin base) creates a microscopic open wound. Your body freaks out and produces thicker, harder scar-like skin to protect itself. It’s a vicious cycle that leaves you with jagged hangnails forever.
- Coarse Metal or Sandpaper Files: Anything under 240 grit will shred the edge of a natural nail, creating microscopic splits that peel three days later.
- Aggressive Buffing Blocks: Those rough, blocky sandpaper cubes designed to scrape off gel residue will thin your natural nail plate until it bends like wet paper. We are not sanding down drywall here.
What to Gather:
- A Glass (Crystal) Nail File: Glass files micro-seal the keratin layers together as you file, completely preventing future peeling and snags.
- A Soft Micro-Grit Cushion Buffer: Look for ultra-fine buffing pads (1000+ grit) designed solely for bringing out natural shine, not taking off material.
- A Wood or Rubber-Tipped Cuticle Pusher: Gentle, forgiving, and physically incapable of gouging a crater into your nail bed.
Phase 2: The “Un-Destroying Your Cuticles” Soaking Bath
If your cuticles look like they’ve survived a cat encounter, no amount of delicate pink pigment is going to fix the vibe. We begin with a deeply restorative, softening soak.
Ingredients:
- 1 cup Warm Water: Warm enough to soften skin, but not scalding (we aren’t making soup).
- 1 tbsp Pure Organic Rosewater: Look for Rose Damascena Distillate on the bottle, not water mixed with synthetic perfume and alcohol. Rosewater naturally calms irritated skin.
- 1 tsp Cold-Pressed Jojoba Oil: Jojoba is technically a liquid wax ester that closely mirrors human sebum, making it uniquely capable of sinking past the nail plate’s outer defenses.
- 3–4 Drops Fresh Lemon Juice: Mild natural citric acid helps gently break down dead skin buildup around the nail folds and brightens yellow surface discoloration.
Safety Warning: Citric acid brightens nail beds, but raw citrus juice on surrounding skin can trigger a sunburn-like rash if exposed to direct sunlight immediately afterward. Rinse your hands with plain water after soaking!
The Prep Routine:
- The Soak: Submerge your fingertips in the bowl for 5 to 7 minutes. Listen to a podcast orrrr 4 minutes of a Ghost track (sorry, you know I love Cardi – but Papa V is coming in hot!).
- The Push: Take your hands out and pat dry. Take your rubber-tipped pusher and gently press the softened dead skin back toward the base of the finger. Do not force anything. If it doesn’t move easily, it’s living tissue—leave it alone!
- The Micro-Buff: Take your soft cushion buffer and make 2 to 3 light passes across each nail. We are only removing loose, microscopic keratin flakes and surface dullness to reveal a smooth canvas.
Phase 3: Natural Pigment & Sheer Options (How to Tint Without Gel)
How do you get a translucent, rosy-pink tone without using heavy synthetic polishes? You have four distinct routes: Botanical Keratin Stains (100% natural, temporary), Raw Beetroot (instant vegetable tint), The Sheer Jelly Polish Hack (DIY low-effort), or Store-Bought Classics (zero prep required).
Option A: Hibiscus & Glycerin Botanical Stain
Hibiscus flowers are naturally loaded with rich pink-red anthocyanins—the same wild pigments found in berries—and vitamin C.
- The Brew: Steep 1 hibiscus tea bag in just 3 tablespoons of boiling water. You want it insanely concentrated—almost black-red. Let it cool completely.
- The Binder: Stir in 1/2 teaspoon of vegetable glycerin. Glycerin is a humectant that adds slight viscosity, helping the watery tea cling to the nail plate instead of running off into your side folds.
- The Application: Dip a cotton pad or small makeup brush into the mixture and paint a thick coat over your bare, clean nails. Let it sit for 4 to 6 minutes while staring at the ceiling.
- The Rinse: Wipe away the excess with a damp cloth. You’ll be left with a delicate, lit-from-within flush of natural rose directly on the nail plate that won’t chip because it isn’t a physical layer sitting on top—it’s a soft stain.
DIY Shelf-Life Warning: Fresh botanical tea stains do not contain preservatives. Store any leftover hibiscus liquid in an airtight jar in the fridge and discard after 3 days, or freeze it in an ice cube tray for quick single-use thaws later!
Option B: Raw Beetroot
If you happen to have a raw beet hanging out in your fridge:
- Cut a fresh slice of beet and press the raw edge directly onto the center of each bare nail bed.
- Immediately take your thumb and rub the juice in circular motions across the entire nail plate before it sets.
- It leaves behind an instant, healthy blush that neutralizes yellow undertones and mimics high blood circulation under the nail.
Option C: Sheer “Jelly Polish” Hack
If you prefer a standard, non-gel polish setup that lasts 5–7 days, do not buy three different expensive sheer polishes. Make your own in 30 seconds.
- Find a clear base coat or non-gel quick-dry topcoat.
- Open a vibrant, cool-toned red or deep berry polish.
- Transfer ONE SINGLE DROP of the red polish into the clear polish bottle using the brush tip.
- Roll the bottle vigorously between your palms (don’t shake it frantically like a maraca unless you want a million tiny air bubbles).
What you’ll end up with is a custom, glass-like pink glaze. Apply one thin coat over clean nails. It goes on almost completely transparent, leaving just a whisper of cool pink that neutralizes discoloration and adds a glossy depth.
Option D: The Store-Bought Holy Grails
If brewing tea at your desk or transferring single drops of polish feels like too much science for your overworked brain, grab an off-the-shelf sheer miracle worker:
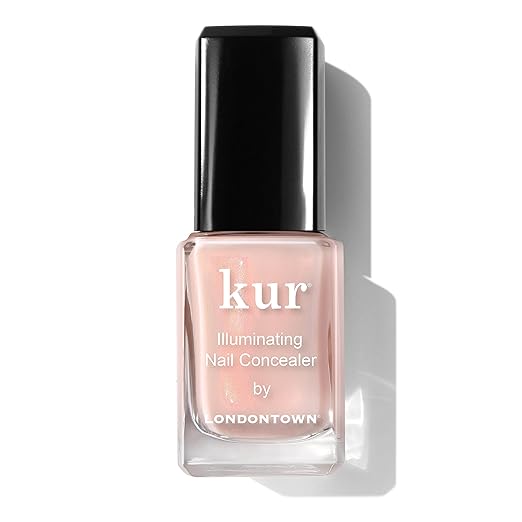
- Londontown Kur Illuminating Nail Concealer: Essentially a real-life Instagram blur filter in a bottle. Uses porcelain flower extract and microscopic optical brighteners to instantly mask ridges and neutralize yellow tones with a sheer, watery milky-pink finish. Air-dries in minutes with zero UV lamps.
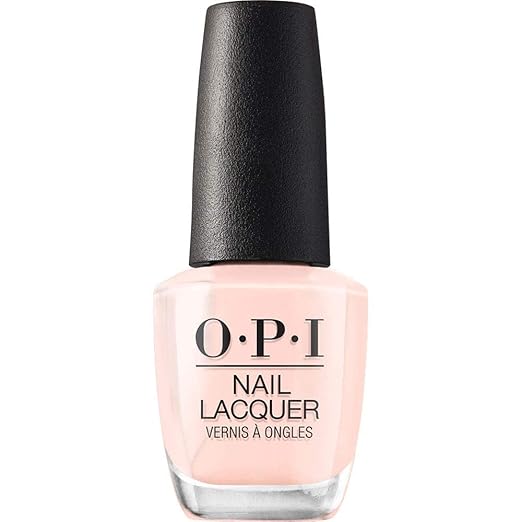
- OPI Bubble Bath: The undisputed queen of translucent sheer pinks. A single coat delivers that exact jelly-like, soft rosy flush without adding heavy opacity or unnatural thickness.
Phase 4: The High-Gloss Seal
Gel manicures look glassy because they are literally cured layers of liquid acrylic plastic. To get that same reflection naturally—or fake the thick gel profile without the damage—choose your finishing method below:
Method 1: The Natural Buff (100% Plastic-Free)
Once your stain or sheer coat is completely dry:
- Apply Pure Jojoba or Rosehip Seed Oil: Place a small drop of oil onto each nail bed and surrounding cuticle tissue. Rosehip oil is packed with essential fatty acids and vitamin A, making it incredible for repairing stressed skin.
- The Friction Buff: Take a tiny piece of silk fabric, a soft microfiber cloth, or a real chamois buffer pad. Using light pressure, buff the oil into the nail in fast, warm circular motions.
- The Result: The friction smooths down the microscopic ridges of the keratin plate and locks the lipids into the upper layers of the nail, creating a mirror-like, watery sheen.
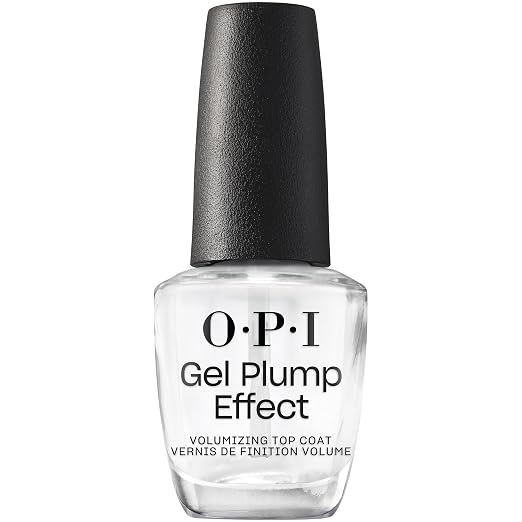
Method 2: The Glassy Gel Fake-Out (OPI Plumping Top Coat)
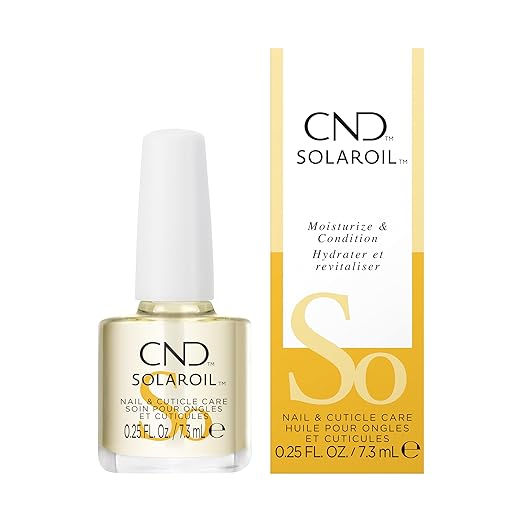
If the primary thing you miss about gel is that thick, juicy, 3D raised dome of shine, skip the oil buff and grab OPI Plumping Top Coat.
- Why it works: It’s an ultra-thick, high-build, non-gel topcoat that dries by standard air exposure. It mimics the plump, pillowy profile of cured builder gel without damaging your natural keratin plate when removed with basic polish remover.
- The Secret Combo: 1 coat of Londontown Kur Concealer (or OPI Bubble Bath) + 1 coat of OPI Plumping Top Coat. You get the sheer rose-water tint paired with a thick, glassy gel finish without touching a UV light or acetone bottle.
Wait, Is This the Same Thing as “Soap Nails” or “Milky Nails”?
Short answer: No, but they are all hanging out in the same minimalist, quiet-luxury VIP lounge. If you’ve been scrolling through beauty social media and your brain is melting trying to figure out if you want rose-water, soap, or milky nails, here is the quick diagnostic breakdown:
- Rose-Water Nails (Translucent): Zero-to-low opacity. Think of a sheer, watery, rose-petal tint over bare, deeply hydrated nail beds. You can achieve this naturally with botanical tea stains, or with a single thin coat of a sheer translucent pink like OPI Bubble Bath or Londontown Kur Illuminating Nail Concealer.
- Soap Nails (Wet-Look): Less about color, more about immaculate cuticle prep and blinding, mirror-like gloss over a whispery nude base. It looks like you just stepped out of a $400 spa bath with hands so clean they squeak.
- Milky Nails (Soft-Focus Blur): Semi-opaque and creamy. Think oat milk or coconut water using a soft sheer white like OPI Funny Bunny. It acts like a soft-focus filter to hide ridges, white spots, or yellowing under a cushiony, semi-opaque layer.
Pro-Tip (The Strawberry Milk Combo): If you own both OPI Funny Bunny and OPI Bubble Bath, apply 1 coat of Funny Bunny first to blur out ridges and imperfections, then top it with 1 coat of Bubble Bath. This creates the viral “Strawberry Milk” manicure—combining the smooth coverage of a milky nail with the juicy pink flush of rose-water.
Troubleshooting Common DIY Nail Traps
| Problem | The Cause | The Fix |
| Nails look yellow instead of pink | Staining from past dark polishes or cooking with turmeric. | Soak nails for 2 minutes in warm water mixed with 1 tsp of baking soda and a squeeze of fresh lemon juice before staining. |
| Cuticles are ragged by noon | Washing hands with harsh, stripping antibacterial soaps. | Switch to a hydrating hand wash and keep a rollerball of oil everywhere you sit. |
| Sheer polish looks streaky | Applied too thick or the brush was held at an angle. | Hold the polish brush completely parallel to the nail plate and use floating, light strokes. |
| Natural stain washed off immediately | Nail plate had leftover oil or lotion on it before staining. | Wipe nails with a splash of witch hazel or rubbing alcohol before applying the tea stain so the keratin can absorb it. |
Daily Maintenance
The entire secret to keeping rose-water nails looking fresh comes down to micro-hydration throughout the day.
- Keep Oil Near Your Workstation: Place a cuticle oil pen next to your keyboard, on your nightstand, or right by the kitchen sink. Every time you finish typing a long email or washing a dish, spend 4 seconds massaging a drop into your cuticles.
- Protect Hands During Cleaning: If you are doing dishes or using household cleaners, wear rubber gloves. Tap water and harsh detergents strip the natural lipids out of your nails, leaving them brittle and translucent in a bad way.
- Nighttime Hand Slather: Before going to sleep, apply a thick layer of simple, unscented cream to your hands, dab a little ointment on your cuticles, and let your body repair the skin barrier overnight.
FAQs
How long do natural rose-water nails last?
If you use the Botanical Tea Stain Method, the flush lasts about 2 to 4 days, fading naturally as you wash your hands. You can reapply the tea stain anytime without damaging the nail. If you use the Diluted Sheer Polish Method, OPI Bubble Bath, or Londontown Kur Concealer, it typically lasts 5 to 7 days before needing a simple, non-acetone touch-up.
Can I do this if my natural nails are short or bitten?
Short nails work great. In fact, this aesthetic looks far better on short, neatly manicured natural nails than long acrylic extensions. The sheer pink tint and ultra-clean cuticle edges give short nails an instantly manicured, put-together look without requiring extra length.
Is gel polish really that damaging to natural nails?
Gel polish itself isn’t inherently evil, but the removal process is notoriously tough on natural nails. Prolonged acetone soaks strip all moisture from the nail plate, and scraping off softened gel often strips away the topmost layers of your natural keratin. Over time, this leaves nails thin, bendy, and prone to peeling.
Will the beet or hibiscus stain dye my skin pink?
If you get the botanical juice on your cuticles, yes, it can leave a minor flush on dry skin for a few hours. To prevent this, apply a thin layer of lip balm or salve to the skin around your nail before painting the stain onto the nail plate.