
The 5-Minute Italian Manicure for Short Nails
This post may contain affiliate links, which means I may earn a small commission if you make a purchase through these links — at no extra cost to you. Thank you for supporting the content I create here on the blog! You can read my full Disclosure Policy for more details.
Listen up, short-nail army. We have all been there. You stare at your hands after typing at a keyboard for eight hours, and you realize your nails look like stubby little potato wedges.
You want the long, elegant claws of a Victorian vampire, but you also need to open soda cans, type emails, and function in actual society without snapping a nail off on a rogue zipper.
You’ve tried growing them out. You’ve taken biotin, you’ve applied strengthening oils that smell like pine trees, and yet—inevitably—the second you reach into your bag for your car keys, SNAP. Back to square one.
Enter the Italian Manicure.
If you haven’t heard of this viral nail wizardry yet, strap in, because it is about to change your life—or at least save you $80 and two hours of small talk at a salon.
Virally popularized by nail artist Alexandra Teleki (aka The Hot Blend), this technique is the ultimate optical illusion for people whose nail beds are shaped more like squares than ski slopes. While session manicurists have used this side-gapping trick on photo shoots and runways for decades to elongate nails on camera, Teleki brought the hack out of the professional shadows and gave it its iconic modern name.
TL;DR: Are your short nails shaped like stubby little potato wedges? Stop painting all the way to the edges. Leave a microscopic, whisper-thin margin of bare nail on the sidewalls to create a vertical optical illusion, slap on a glossy top coat, and fake your way to long, expensive-looking claws in five minutes flat with zero fake acrylic damage.
What Is an Italian Manicure?
Let’s get one thing straight: this isn’t a new color, a fancy gel system, or some plastic extension glued to your flesh with industrial cement. It’s a painting technique.
Traditional manicures tell you to paint all the way to the absolute perimeter of your nail, flooding every single edge to make sure no millimeter of keratin is left behind.
But if your nails are short or naturally wide, doing that creates a visual trap. It emphasizes the horizontal width, making them look even shorter and wider—like little concrete paving blocks.
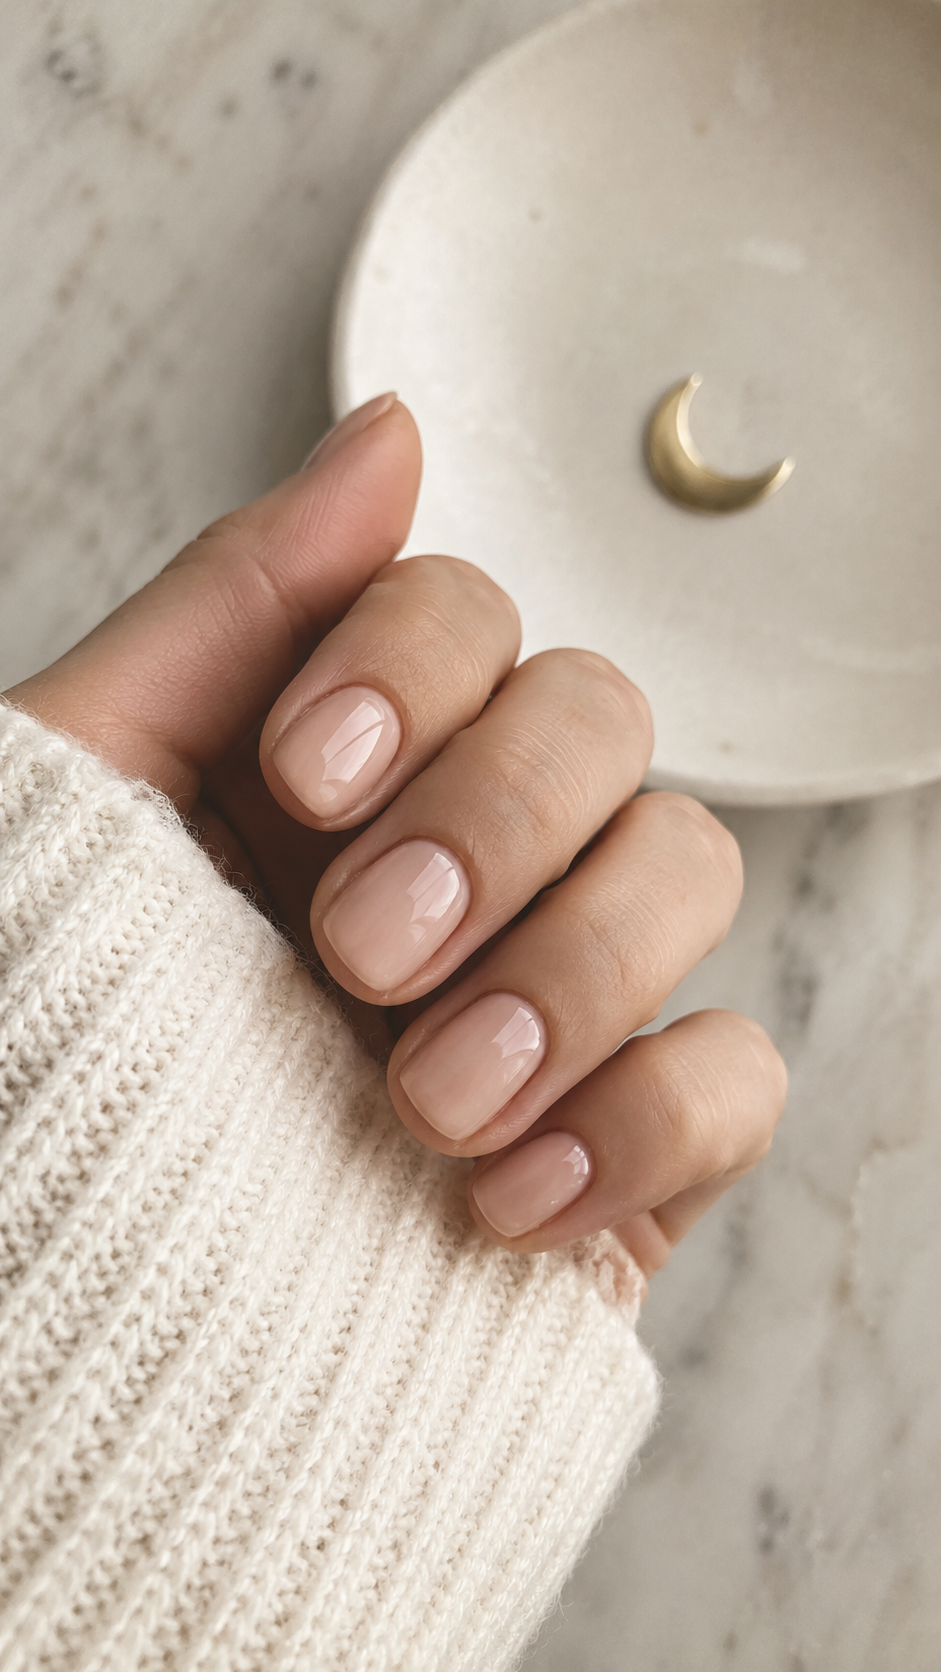
The Italian Manicure does something wildly clever. You get super close to the cuticle at the base, but you leave a microscopic, whisper-thin margin of bare nail along the sidewalls (the sides).
Why? Because human eyeballs are easily tricked. That tiny strip of exposed natural nail creates a vertical visual tunnel. Suddenly, your nail looks longer, slimmer, and infinitely more expensive. It’s basically contouring, but for your fingers.
Why Short-Nail Lovers Are Obsessed
- Zero Damage: No acrylics, no harsh electric files, no crying while soaking off gel in pure acetone for three hours because a fake nail ripped off your actual nail bed.
- Speed: You can slap this together in about five minutes flat once you get the hang of the muscle memory.
- Typing Friendly: You can still type at 120 words per minute without sounding like a tap-dancing horse on your laptop or accidentally hitting three keys at once.
- It Looks Expensive: It gives major “quiet luxury” vibes even if you painted your nails sitting cross-legged on the floor of your living room while watching trashy reality TV.
Bonus Round: The Italian French Manicure
Think you have to choose between a classic French tip and the Italian technique? Think again.
Traditional French tips on short, wide nails can sometimes accidentally backfire and emphasize that blocky width if the white tip stretches all the way into the corners. Enter the Italian French Manicure.
You take the French tip, but you also apply the Italian sidewall. By leaving that microscopic, whisper-thin margin of bare nail along the edges while rocking a crisp tip, you get a nail that looks both classically French and impossibly elongated. Go traditional with milky white, or go feral with a neon or vampy red tip. Either way, you’re basically royalty now.
Can You Do an Italian Manicure on Long Nails?
While born as a hack for short nail beds, the Italian Manicure can work on longer nails under the right circumstances:
- Works Great On: Wide, square, or “squoval” long nails. The side-gapping visually slims the width and creates a subtle tapered illusion (similar to an almond shape) without requiring you to file away the structural sides of your nail plate.
- Skip It On: Nails that are already long and naturally narrow, stiletto, or almond-shaped. Applying this technique to slender, long nails can make them look disproportionately thin or give the appearance of an incomplete, rushed polish job.
Note for long nails: Keep the sidewall gap ultra-microscopic. On longer nails, a wide gap easily looks like your polish is growing out from the sides.
The Polish Color Matrix: What Works Best?
You can try this with a neon yellow, but unless you want to look like a traffic cone, let’s look at what actually sells the illusion:
- Vampy Reds & Deep Plums: The undisputed champions. High contrast against your skin and the bare sidewalls means maximum drama.
- Rich Chocolates & Espressos: For when you want to look like an expensive cup of coffee walking into a board meeting.
- Milky Sheers & Neutrals: If you prefer the “clean girl” aesthetic, a semi-sheer milky white or pale pink stretched thin down the center creates a ghostly, elongated grace.
The Secret Weapon: Nail Concealer
Think of standard nail polish as a full-coverage, matte foundation—it completely coats your nail plate in heavy, opaque pigment. Nail concealer? She is the tinted moisturizer, CC cream, and glowing glass-skin serum of the nail world.
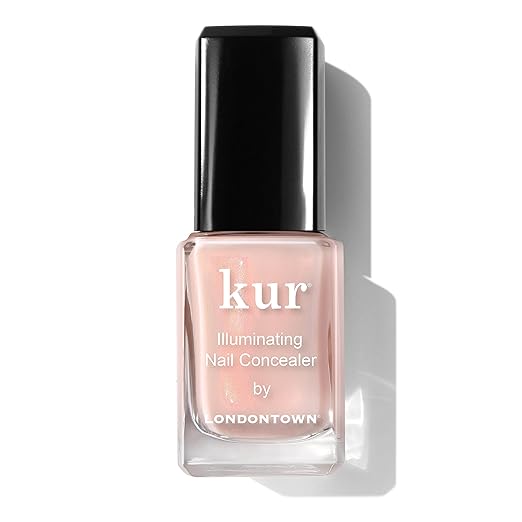
If you’re trying to pull off that effortless “clean girl” or “quiet luxury” aesthetic without putting in actual labor, you’ve probably seen everyone on your feed swapping traditional polish for these magic little bottles (most notably Londontown Kur’s cult-favorite Illuminating Nail Concealer).
It’s a sheer, milky, light-diffusing wash of color that acts like a real-life filter for your fingers. It blurs weird ridges, neutralizes yellowing, hides embarrassing stains from dark polish, and bounces light—all while letting your natural nail peek through like you just naturally live an ultra-hydrated, stress-free life.
Why it’s an absolute cheat code for the Italian Manicure: Because concealers are semi-sheer and scatter light down the center of your nail, sweeping one coat down the middle gives you the ultimate “my nails but richer” illusion. The glowing center column draws every eye upward, while those microscopic bare sidewalls blend seamlessly into your skin tone. Nobody will notice where your nail plate ends and the polish begins.
The 5-Minute Step-by-Step Guide
Grab whatever polish is currently rolling around at the bottom of your bag. We’re doing this right now.
Step 1: Prep the Nail Plate
Do we have time for a 20-step spa ritual? Absolutely not. Push your cuticles back gently with a wooden stick or your thumb so you can maximize every millimeter of actual nail estate. Wipe them clean with a drop of rubbing alcohol or polish remover so the lacquer actually sticks.
Step 2: Set the Base Line
Take your color and place your brush right near the base. Push it as close to the cuticle as humanly possible without actually flooding your skin.
Step 3: Paint the Sidewall Gap
Normally, you’d sweep the brush all the way out to the edges of the nail. Stop right there, rebel. Leave the tiniest, almost invisible sliver of natural nail bare on both the left and right sides. It feels wrong. It goes against everything society taught you. Trust the process.
Pro-Tip on Polish Selection: Creme, solid, and opaque polishes are your absolute best friends here. Leave the chunky glitters and heavy shimmers in the drawer for this specific technique—they scatter the light and ruin the crisp optical-illusion lines you’re working so hard to build.
Step 4: Top Coat & Cap the Free Edge
Seal the manicure with a high-shine, glossy top coat. Finish by capping the free edge (also known as a tip recap)—running the side of your polish brush horizontally along the very front edge of the nail where it ends. This seals the raw polish edge, preventing water and friction from lifting the lacquer from the front backward.
Common Mistakes That Will Ruin Your Manicure
- Leaving Too Much Space: We are making an optical illusion, not a transparent stained-glass window. The margins on the sides should be so thin that people have to squint to see them. If you leave a massive gap, it just looks like you missed a spot.
- Using Matte Top Coat: Don’t do it. Matte finishes absorb light, which completely kills the vertical reflection tunnel. We need gloss. Maximum shine. Blinding brilliance.
- Impatient Air-Drying: Smudging your masterpiece because you tried to check your phone three seconds after finishing is a rite of passage, but please—invest in a quick-dry top coat or hover your hands like a ghost until they dry.
Emergency Troubleshooting Hacks
Let’s be real: drawing a straight line is going to be a struggle for most of us. Use these hacks:
- The Liquid Latex Barrier: Paint a peel-off latex barrier around your cuticles and sidewalls before you start. Slap the polish on with zero anxiety, then peel it away like a satisfying scab. Boom. Instant neatness.
- The Cleanup Brush: If you don’t have latex, grab a tiny angled eyeliner brush (or an old makeup brush), dip it in nail polish remover, and carve out those razor-sharp vertical margins after the fact.
Maintenance: Making It Last
You’re probably going to chip these within 48 hours. BUT here is the beauty of the Italian Manicure: because you left the edges bare on the sides, minor wear is actually way less noticeable than a standard manicure.
To stretch the life of your masterpiece, swipe a fresh, ultra-thin layer of top coat across the nail and lightly cap the very tip every 2 to 3 days. Resist the urge to layer top coat every single night—stacking daily layers causes polish shrinkage, thick gummy buildup, and will eventually make the whole polish shell pop right off.
The Verdict
Are your nails actually growing? No. Are you spending any money? Also no. But do your hands look like you just stepped out of a Milan fashion editorial instead of frantically speed-eating snacks at your desk? Absolutely.
FAQs
What is the difference between an Italian manicure and a regular manicure?
Regular manicures paint edge-to-edge, which can make short nails look blocky. The Italian method leaves a microscopic bare margin on the sides to optically elongate your fingers.
Who invented the Italian manicure?
Leaving unpainted margins along the sidewalls is an old session-manicurist trick used on runways for decades. However, nail artist Alexandra Teleki (aka @thehotblend) virally popularized the technique and coined the “Italian Manicure” name on social media.
Does an Italian manicure actually make short nails look longer?
Yes, via pure optical illusion. That tiny strip of exposed sidewall creates a vertical visual tunnel that instantly slims and lengthens.
Can you do an Italian manicure at home?
Easily. Grab whatever polish is rattling around in your bag, do the sidewall swerve, and you’re done in five minutes flat.
How long does an Italian manicure last?
Surprisingly long. Because the edges are bare, chip wear is way less obvious. When prepped correctly and refreshed with a top coat and tip recap every 2 to 3 days, an Italian manicure on natural nails typically lasts 7 to 10 days without major chipping.